CentOS KVM Install – Quick Start to a VM
I am a network engineer by profession, but with the proliferation of SDN and OpenFlow, I have had to spend a lot of time re-learning a lot of system admin skills that I’d shelved years ago. Now, I’ve been a virtualization user forever. From VMware (Fusion, ESX), VirtualBox , to Parallels , I’ve used them at least in testing if not in production environments. I’d not really spent any mentionable amount of time with XEN , qEMU or KVM , but some projects I was working on suggested it for the virtualization mechanism, so I figured I’d try to pick it up. I think the hosting provider of this blog is using it to provide the VPS that this site runs on, so it is clearly production quality. In looking around for a straightforward how-to, a few things became obvious pretty quickly: KVM is very robust. KVM and qEMU have got a lot of documentation, but not all of it is straightforward. They have a lot of pieces needed to make it work efficiently. It wasn’t a plug and run experience, by any means. I wanted a headless, remotely manageable system that ran on a bare minimum install (i.e. no GUI). After a late evening of hacking at it, here is what I finally had to do to get it running and build a functional VM on a fresh install of CentOS 6.3. Install all the dependancies. And there were many. Coming from using the VirtualBox CLI, little things that I expected didn’t work if I didn’t have this or that installed.
yum install -y qemu-kvm.x86_64 qemu-kvm-tools.x86_64 \
kvm libvirt bridge-utils tunctl python-virtinst.noarch avahi
Restart the deamons
/etc/init.d/messagebus restart
/etc/init.d/avahi-daemon restart
/etc/init.d/libvirtd restart
Make the new daemons start at boot:
/sbin/chkconfig messagebus on
/sbin/chkconfig avahi-daemon on
I want to bridge rather than NAT. My VMs need to have a public (or same LAN segment) address as the rest of the hosts for external management and availability of inbound services. For this, we need to adjust the interfaces. I want to run the bridge on a second interface and keep the host system management on a dedicated interface.
vi /etc/sysconfig/network-scripts/ifcfg-eth1
Your file should look something like this when done:
DEVICE="eth1"
HWADDR="c0:ff:ee:c0:ff:ee" # (leave this as your MAC address)
NM_CONTROLLED="yes"
 BRIDGE=br0
 ONBOOT="yes"
UUID="a9c26927-7650-42e9-a86a-1ae1227eac4b" #leave this as your UUID)
vi /etc/sysconfig/network-scripts/ifcfg-br0
Your file should look something like this when done:
DEVICE="br0"
TYPE="Bridge"
BOOTPROTO="static"
IPADDR="10.10.10.50" # Use your own IP address
NETMASK="255.255.255.128"
GATEWAY="10.10.10.1" # Provide your gateway
IPV6INIT="yes"
IPV6_AUTOCONF="yes"
NM_CONTROLLED="yes"
ONBOOT="yes"
Restart the network to make it active.
service network restart
You’re going to use virt tools and virsh to manipulate the guests. I tried it a few other ways and this seems far more supportable. I wanted to install a CentOS 6.3 guest, I grabbed the install media from a local mirror . I have a volume mounted as /services that I keep stuff in.
mkdir /services/vm/template-host
cd /services/vm/template-host
wget http://cosmos.cites.illinois.edu/pub/centos/6.3/isos/x86_64/CentOS-6.3-x86_64-bin-DVD1.iso
Now use the virt-install command to boot the system with the following parameters: 2G of RAM 50G disk named disk.img Console redirected to a VNC instance on port 5901 Network interface attached to br0 4 CPUs CDROM points to install image
virt-install --name template-host --ram 2048 --disk /home/vm/template-host/disk.img,size=50 \
--graphics vnc,port=5901 --network bridge=br0 --vcpus=4 --os-type=linux \
--cdrom=/home/vm/Install_Media/CentOS-6.3-x86_64-bin-DVD1.iso
Now, to connect to the console, you’ll need to tunnel VNC over ssh. This can be adjusted, but that’s outside of the scope of this. I like to redirect real port numbers for my own sanity.
ssh -N -p 22 -c 3des buraglio@vmhost -L 5901/localhost/5901
The above command will redirect localhost port 5901 to port 5901 on the host vmhost Connect to the VNC server:
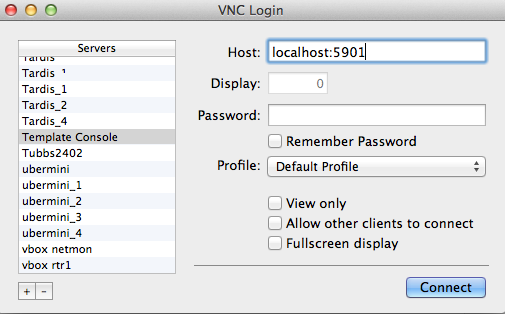
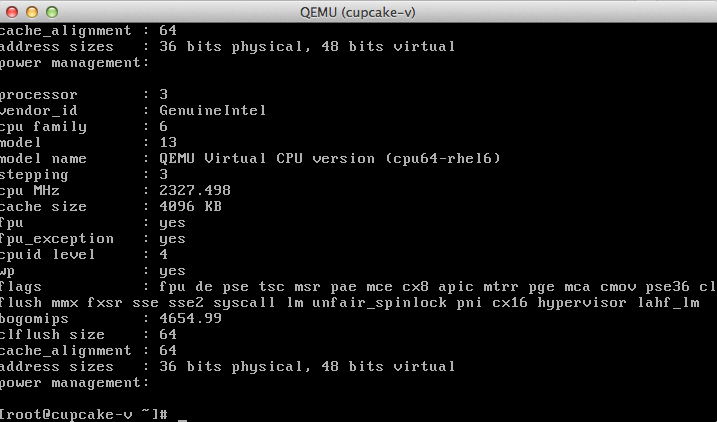
Once connected you should drop right into the console of the KVM instance. Install as a normal system at that point.
Once installed It’ll appear as a normal host console.
I found virsh to be the most useful for manipulating the virtual machine.
[root@behemoth Install_Media]# virsh list
Id            Name                                      State
----------------------------------------------------
9              template-host                         running
Helpful commands I found after 30 minutes of poking around and playing with virsh:
virsh list –show the list of virtual machines
virsh destroy
Here is a complete list of the commands.